
This is the quickest, easiest way to create a Facebook Fan Page to get free traffic, leads and sales.
1. Go to Facebook.com/pages
Once you’re on Facebook.com/pages, click the green “Create a Page” button in the upper right.
Then select which category your business is: Local business or place, Company, Organization or Institution, Brand or Product, Artist, Brand or Public Figure, Entertainment, Cause or Community.
If you are unsure which you belong to, select Company, Organization, or Institution.
After you click the large square corresponding to your business type, you’ll be asked to fill out some information.
This information will be different depending on which category you picked. For example, if you picked “Company, Organization, or Institution”, you’ll be asked to choose a sub-category and then to type your company name.
Read: How To Grow Facebook Page Without Spending Money On Ads
When complete, don’t forget to click “I agree to Facebook Pages Terms”, then click the blue “Get Started” button.
2. Complete basic information to boost brand visibility and SEO
During this step, you’ll be asked to select a profile picture, fill out your about section, and set up your Facebook Web Address.
When considering your Profile Picture, be sure you pick an image that is 180px by 180px. Once uploaded, the image will show on your fan page at about 165px by 165px.
Once you’ve either uploaded your profile picture or imported it from your website, click save photo and click next. If you want to leave your picture blank for now, its ok to click the “skip” button for now.

Next, you’ll want to fill out some basic information about your business. When filling in your basic information, consider being clear and concise while also including keywords relevant to your business.
For example, if you are a social media consultant, you’ll want to use other keywords in your description like Facebook or Twitter marketing. This’ll help you get more leads through Facebook search later on.

Then type in your website URL and if you have a question with a yes and no radio button present, be sure to click yes, then click “Save Info”.
Lastly, you’ll want to set up your Facebook pretty link. Think about this like buying a pretty domain name from GoDaddy. This is the link your potential customers will type in to find you. Make it short and memorable.
Read: Learn How to Create a WordPress Blog in One Hour
Facebook will recommend you use your business name you entered earlier however, if that name is complicated or hard to remember, you may consider something shorter and more memorable.
Click “Set Address”.
3. Get smarter by using your admin panel
Only the fan page administrators can see the admin panel. The admin panel highlights core pieces of your page including Notifications, new people who have liked your page, and insights which will tell you how well your fan page is doing.

Additionally, use the “Edit Page” navigation option to update your info or add new administrators. You can also use the “Build Audience” navigation option to start inviting people to your page.
Be careful how you use this though. You’ll want to invite folks after your page is filled with remarkable content which brings us to the next step.
4. Fill your page with content through storytelling
Congratulations, you now have your basic page set up. This step is what will really decide how successful your page will be. It also takes the most time.
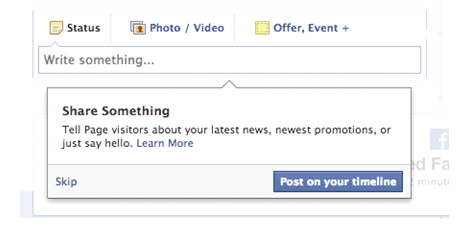
You’ll want to focus on filling your page with status updates, milestones, images, videos, and other content that shares value with your fans and tells your brand story.
Additionally, add in a cover photo to help build your brand. The cover photo should be 851px wide by 215px tall.
5. Build custom tabs to generate leads, traffic, and sales
After you’ve delivered amazing content through your Fan Page wall, start implementing strategies to drive traffic, leads, and sales from your page.
Read: Free Blog Directories To Submit your Blog To Get Traffic
One tab will focus on collecting email leads from your fan page, one will focus on capturing more traffic, and one will enable you to sell your products (even collect credit card payments!) all through your fan page.
[maxbutton id=”3″ url=”http://www.christiansdigitallifestyle.com/500k-fans-in-180-days.html”]